JKB Handels GmbH c/o REGUS Berliner Allee 47 64295 Darmstadt
+49 (0) 6196 97276 19
A leaking cabin is a sign that a shower seal needs to be replaced. In this article you will learn how to do it, and which seal to pick.
Shower seals are necessary to maintain a leak-free bathroom. After all, no one likes a flooded floor every time they shower, right? Seals should be cleaned regularly and replaced if necessary.
Before you start purchasing you should choose the right replacement part. Steigner offer includes several dozen models of shower seals. When choosing, pay attention to:
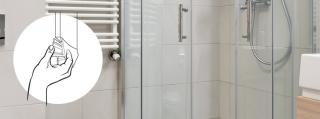
After receiving a seal that meets the above requirements, we start the installation.
Remove the old element and clean the installation site. Thoroughly remove all dirt and dry the surface.
Apply the seal and press it onto the door/window. Remember that after installation the seal can not be moved, therefore, make sure it is in the precise place. If its difficult for you to snap the seal on, apply a little bit of water onto the glass. If it is too wide, apply a small amount of transparent silicone to the edge of the glass and install the element before silicone dries.
Check that the seal is properly installed. When sealing a door, check if it’s difficult to open or close it.
Finished! Shower secured in this way will not leak. If you clean and check the shower seal regularly, then its life will be significantly extended. We also recommend Steigner cleaning agents that will help you keep the bathroom nice and neat.